How to Build and Deploy a Spring Boot Microservice on a Kubernetes Cluster Using GitHub Actions Workflows
Jan 16, 2024 in Data-Powered Business Innovation by Admirise Team
In modern app development, the integration of microservices and container orchestration through GitHub Actions, leveraging Spring Boot’s simplicity and versatility, is crucial. Paired with Kubernetes, it facilitates streamlined deployment, scaling, and management of distributed applications.
This article delves into creating a Spring Boot microservice and deploying it to a Kubernetes cluster, providing a simple guide to harness the combined potential of these technologies. As organizations embrace cloud-native solutions, understanding the seamless integration of Spring Boot and Kubernetes is crucial for building agile, maintainable, and scalable applications.
In this tutorial, we’ll guide you through the process of creating a Spring Boot microservice, using Gradle as the build system, and deploying it on a Kubernetes cluster.
- Prerequisites
- Step 1: Set Up a Spring Boot Project
- Step 2: Create the Post Record/Class and PostController
- Step 3: Configure Docker Image
- Step 4: Create Github Access Token and Docker Registry Secret
- Step 5: Get Kubernetes Config and Create GitHub Actions Secret Variable
- Step 6: Create Kubernetes Deployment, Service, and Ingress Resources.
- Step 7: Create GitHub Actions Workflow
- Build Phase
- Deploy Phase
Prerequisites
Before we dive into the tutorial, ensure that you have the following tools installed:
- Java Development Kit (JDK)
- Docker
- A running Kubernetes cluster (you can use tools like Minikube for local development)
- Gradle (If you choose to use the Gradle wrapper, there is no need to manually install Gradle)
Step 1: Set Up a Spring Boot Project
Start by creating a new Spring Boot project using Spring Initializer or your preferred method. You can include the necessary dependencies according to the requirements of your project, such as Spring Data, Security, or JPA, in your build.gradle file. I’ve created the project using an initializer, and in order to keep the project simple I’ve included only Spring Web dependency.
Define the name of the app in settings.gradle file:

Add necessary dependencies to build.gradle :
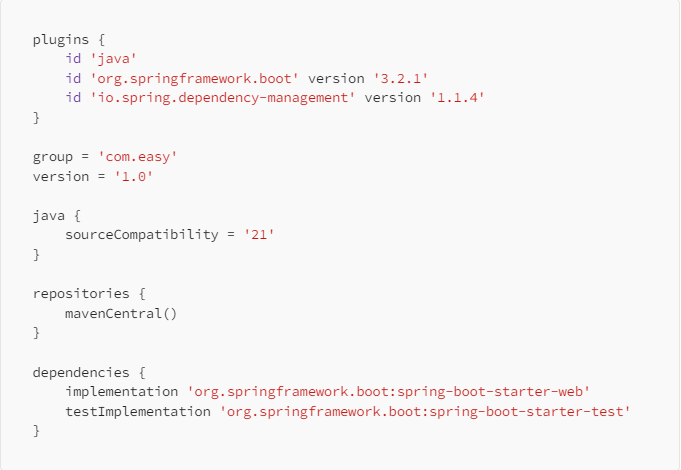
You may build the project via gradlew buildcommand to see whether it is configured correctly or not:

then you can run the project with gradlew bootRun command in the project directory:

Open your web browser and navigate to http://localhost:8080 to confirm that the microservice is running.
Step 2: Create the Post Record/Class and PostController
Define thePost entity class to represent the data structure of a post. Add fields such as id, title, and content.

Record is used instead of class literal to avoid using lombok like frameworks to provide immutability in a simple way.
Now, create a REST controller class (PostController) to handle HTTP requests related to posts. Use the @RestController and @RequestMapping annotations to define the base path for your API.
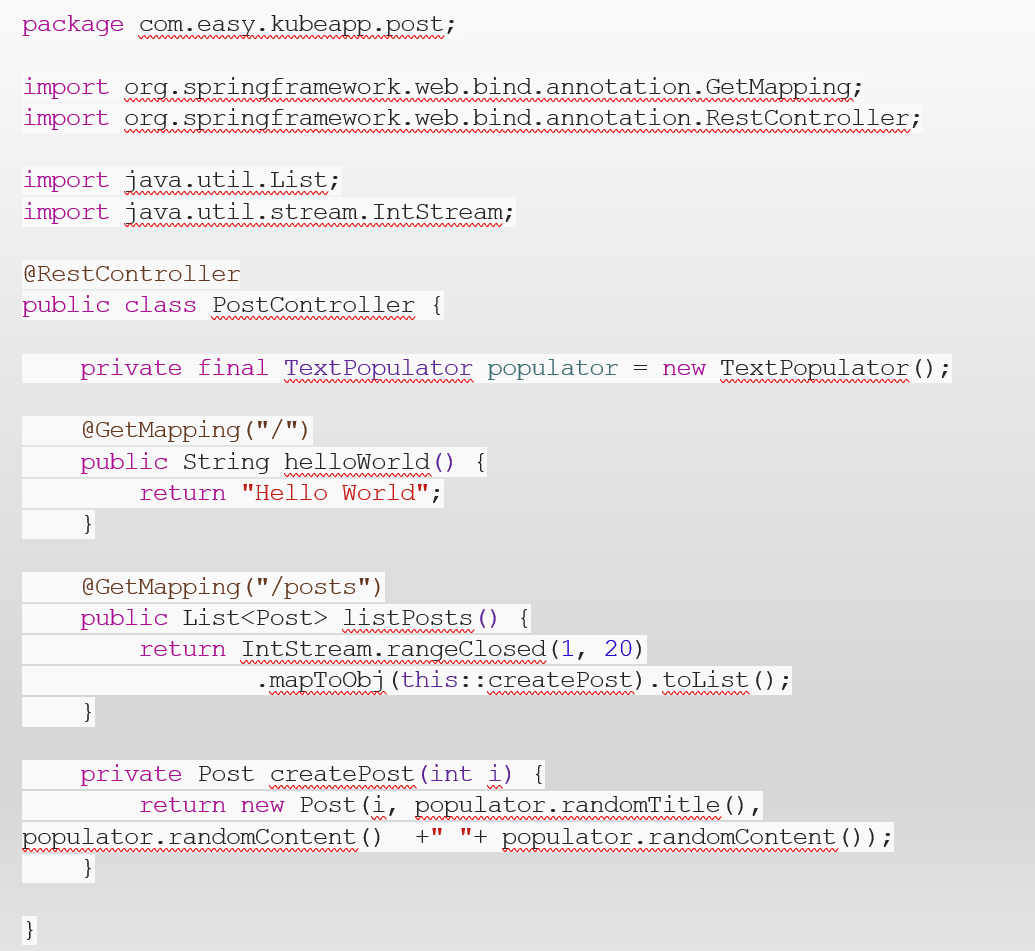
PostController is configured to return data from /and /posts endpoints
Run the Spring Boot application and navigate tohttp://localhost:8080/posts in your favorite web browser or API testing tool. You can use tools like RapidAPI, Postman or Swagger to interact with the exposed endpoints.
When you successfully run the project you may pass to Dockerize / Containerize phase.
Step 3: Configure Docker Image
Create a Dockerfile in the root of your project to define the Docker image for your spring boot microservice. Here’s a basic example:

Here kube-app is the name of the project, which comes from rootProject.name a property in settings.gradle file and version info are provided in build.gradle file with version property. You need to change
COPY build/libs/<your-app-name>-<version>.jar app.jar
the directive in the Dockerfile according to your project name and version. After you configured Dockerfile to your needs you may build your Docker image:

After building the Docker image, execute the following command to run it:

After setting up your microservice, navigate to http://localhost:8080 using your preferred web browser or a REST tool such as Postman or RapidAPI. Check for the expected responses from the / and /postsendpoints. If everything is configured correctly and your microservice returns the appropriate values, voila! Your setup is ready to go.
...
Up to this stage, we have configured a Spring Boot microservice application based on Gradle to build and operate within a Docker environment. Moving forward, we will configure this application to deploy and run on a Kubernetes cluster using GitHub Actions workflow.
Step 4: Create Github Access Token and Docker Registry Secret
Before preparing the Github Actions workflow we need to create a personal access token on Github using this link. Specify a name for it and select only read:packages the scope to read registry images. Generate your token and save it to a permanent place because it is not possible to see it again on the GitHub Access Tokens page.
...
After you created a Github Personel Access Token, go to your existing Kubernetes Cluster and run the following command to create a Docker registry secret using your Github Access Token:

Pay attention to the name of the secret (my-docker-registry-secret). This secret will be used later by the Kubernetes deployment.yaml to fetch the Docker image of your app from the Github Private Package/Docker Registry as follows:

Step 5: Get Kubernetes Config and Create GitHub Actions Secret Variable
In order to access Github Actions to the Kubernetes Cluster, the content of the Kubernetes Cluster config file must be copied and stored as a Github Actions Secret Variable on the Github repository.
To copy the Kubernetes Cluster config file, run the command below on your cluster:

Remember to keep your kubeconfig file secure, as it contains sensitive information for accessing your Kubernetes cluster.
Copy the contents of kubeconfig.yaml to the clipboard. Go to GitHub repository settings and create a Github Actions Secret using this link. Name the secret variable KUBECONFIGand paste the contents of kubeconfig.yaml file from the clipboard. The name of the secret variable is important as it will be used in the GitHub Actions workflow file later.
Step 6: Create Kubernetes Deployment, Service, and Ingress Resources.
To deploy and run a Spring Boot Microservice application on a Kubernetes Cluster, it’s essential to create deployment, service, and ingress resources. While the Kubernetes Cluster requires only the deployment.yaml file to run the application, the service and ingress resources must be defined to facilitate communication between cluster-wide microservices and expose the application to the outside world. To make things easier and simpler, all three resource files are combined into a single project.yamlresource file.
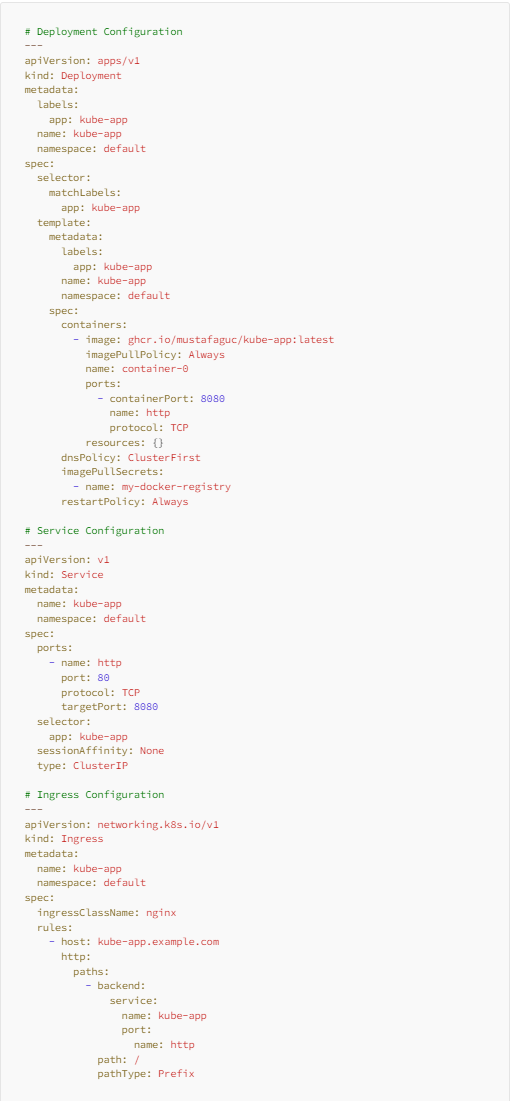
Here are some important config values:
Deployment, service, ingress name, and match labels:
In the provided configuration, the identifierskube-app serve as the names for deployment, service, and ingress. Feel free to customize these names, ensuring they align with the specified selector labels for consistency.
Docker image:
A Docker imageghcr.io/<github-username>/<repository-name>:latest is used. It must be replaced with the values of your project.
Docker image pulls secret:
my-docker-registry secret value is used to fetch Docker images from GitHub's private Docker registry. It must be created on an existing Kubernetes Cluster. The configuration of this secret is mentioned under Step 4.
While various Kubernetes configurations are available, this article focuses on maintaining simplicity and conciseness by omitting detailed configurations.
Step 7: Create GitHub Actions Workflow
The GitHub Actions Kubernetes deployment workflow serves as an essential automation process for deploying applications on a Kubernetes cluster directly from a GitHub repository. The GitHub Actions Kubernetes deployment workflow is crucial for automating, streamlining, and enhancing the reliability of the deployment process in Kubernetes environments, fostering a more efficient and collaborative development lifecycle.
In order to build, push, and deploy a Gradle-based Java Spring Boot Microservice application to Kubernetes Cluster, the following GitHub Actions workflow can be used:
# This workflow will build a Java project with Gradle and cache/restore any dependencies to improve the workflow execution time
# For more information see: https://docs.github.com/en/actions/automating-builds-and-tests/building-and-testing-java-with-gradle
name:JavaGradleBuild&DockerPush
on:
push:
branches: [ "main" ]
pull_request:
branches: [ "main" ]
env:
# Use docker.io for Docker Hub if empty
REGISTRY:ghcr.io
# github.repository as <account>/<repo>
IMAGE_NAME:${{github.repository}}
jobs:
build:
runs-on:ubuntu-latest
permissions:
contents:read
packages:write
# This is used to complete the identity challenge
# with sigstore/fulcio when running outside of PRs.
id-token:write
steps:
-uses:actions/checkout@v3
-name:SetupJDK21
uses:actions/setup-java@v3
with:
java-version:'21'
distribution:'temurin'
-name:BuildwithGradle
uses:gradle/gradle-build-action@bd5760595778326ba7f1441bcf7e88b49de61a25# v2.6.0
with:
arguments:build
# Install the cosign tool except on PR
# https://github.com/sigstore/cosign-installer
-name:Installcosign
if:github.event_name!='pull_request'
uses:sigstore/cosign-installer@6e04d228eb30da1757ee4e1dd75a0ec73a653e06#v3.1.1
with:
cosign-release:'v2.1.1'
# Set up BuildKit Docker container builder to be able to build
# multi-platform images and export cache
# https://github.com/docker/setup-buildx-action
-name:SetupDockerBuildx
uses:docker/setup-buildx-action@f95db51fddba0c2d1ec667646a06c2ce06100226# v3.0.0
# Login against a Docker registry except on PR
# https://github.com/docker/login-action
-name:Logintoregistry${{env.REGISTRY}}
if:github.event_name!='pull_request'
uses:docker/login-action@343f7c4344506bcbf9b4de18042ae17996df046d# v3.0.0
with:
registry:${{env.REGISTRY}}
username:${{github.actor}}
password:${{secrets.GITHUB_TOKEN}}
# Extract metadata (tags, labels) for Docker
# https://github.com/docker/metadata-action
-name:ExtractDockermetadata
id:meta
uses:docker/metadata-action@96383f45573cb7f253c731d3b3ab81c87ef81934# v5.0.0
with:
images:${{env.REGISTRY}}/${{env.IMAGE_NAME}}
# Build and push Docker image with Buildx (don't push on PR)
# https://github.com/docker/build-push-action
-name:BuildandpushDockerimage
id:build-and-push
uses:docker/build-push-action@0565240e2d4ab88bba5387d719585280857ece09# v5.0.0
with:
context:.
push:${{github.event_name!='pull_request'}}
#tags: ${{ steps.meta.outputs.tags }}
tags:|
${{ env.REGISTRY }}/${{ env.IMAGE_NAME }}:latest
${{ env.REGISTRY }}/${{ env.IMAGE_NAME }}:${{ github.sha }}
labels:${{steps.meta.outputs.labels}}
cache-from:type=gha
cache-to:type=gha,mode=max
deploy:
name:Deploy
needs: [ build ]
runs-on:ubuntu-latest
steps:
-name:SettheKubernetescontext
uses:azure/k8s-set-context@v3
with:
method:kubeconfig
kubeconfig:${{secrets.KUBECONFIG}}
-name:Checkoutsourcecode
uses:actions/checkout@v3
-name:DeploytotheKubernetescluster
uses:azure/k8s-deploy@v4
with:
skip-tls-verify:true
manifests:|
kubernetes/project.yaml
images:|
${{env.REGISTRY}}/${{env.IMAGE_NAME}}:${{github.sha}}
This workflow contains these steps:
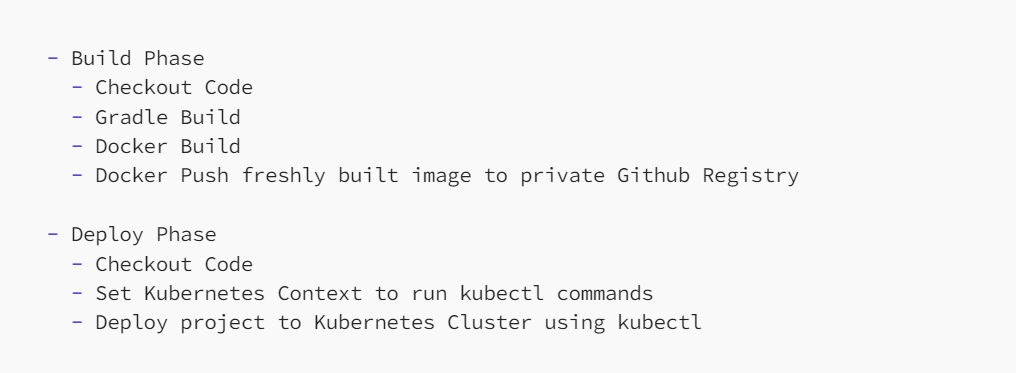
This workflow may be used without changing it’s values as long as KUBECONFIG values are defined as Github Actions Secret Repository value as mentioned in Step 5.
This streamlined workflow consists of the following fundamental steps:
Build Phase
Checkout Code: Retrieves the source code from the repository to initiate the build process.
Gradle Build: Executes the Gradle build process, compiling and preparing the Spring Boot microservice application.
Docker Build: Constructs a Docker image encapsulating the application, ensuring its encapsulation and portability.
Docker Push: Uploads the freshly built Docker image to a secure private GitHub Registry, providing a centralized repository for versioned images.
Deploy Phase
Checkout Code: Reacquires the source code for the subsequent deployment steps.
Set Kubernetes Context: Configures the Kubernetes context, enabling the execution of kubectl commands on the specified cluster.
Deploy to Kubernetes Cluster: Initiates the deployment of the project onto the Kubernetes Cluster using kubectl, ensuring the seamless integration of the updated application.
This workflow is designed for ease of use and adaptability, requiring minimal modification. The only essential customization is defining the KUBECONFIG values as a GitHub Actions Secret Repository, as outlined in Step 5. This ensures a secure and portable configuration for accessing the Kubernetes cluster.
By following these steps, developers can seamlessly automate the build and deployment processes of their Spring Boot microservice on a Kubernetes cluster, promoting efficiency and consistency in the software development lifecycle.
The configurations and source code can be accessed under the kube-app GitHub repository.
Enjoy a productive development process!


